
你不会还在本地部署hexo吧?
众所周知,用hexo+gitpage能搭建很不错的博客,但是有个比较致命的缺点,不方便跨平台部署,当然你也可以选择将其部署至服务器,或者压缩拷贝
就连backup插件也还是得需要在本地安装nodejs等服务,可谓是让人觉得头疼
这些问题遇到CI都可以迎刃而解,除了人尽皆知的Travis-CI,另一个不错的方案是使用GithHub提供的Action,相信我,用过它的人都说好
虽说过程有些麻烦,但是可以一劳永逸的解决多端设备都能快速部署hexo
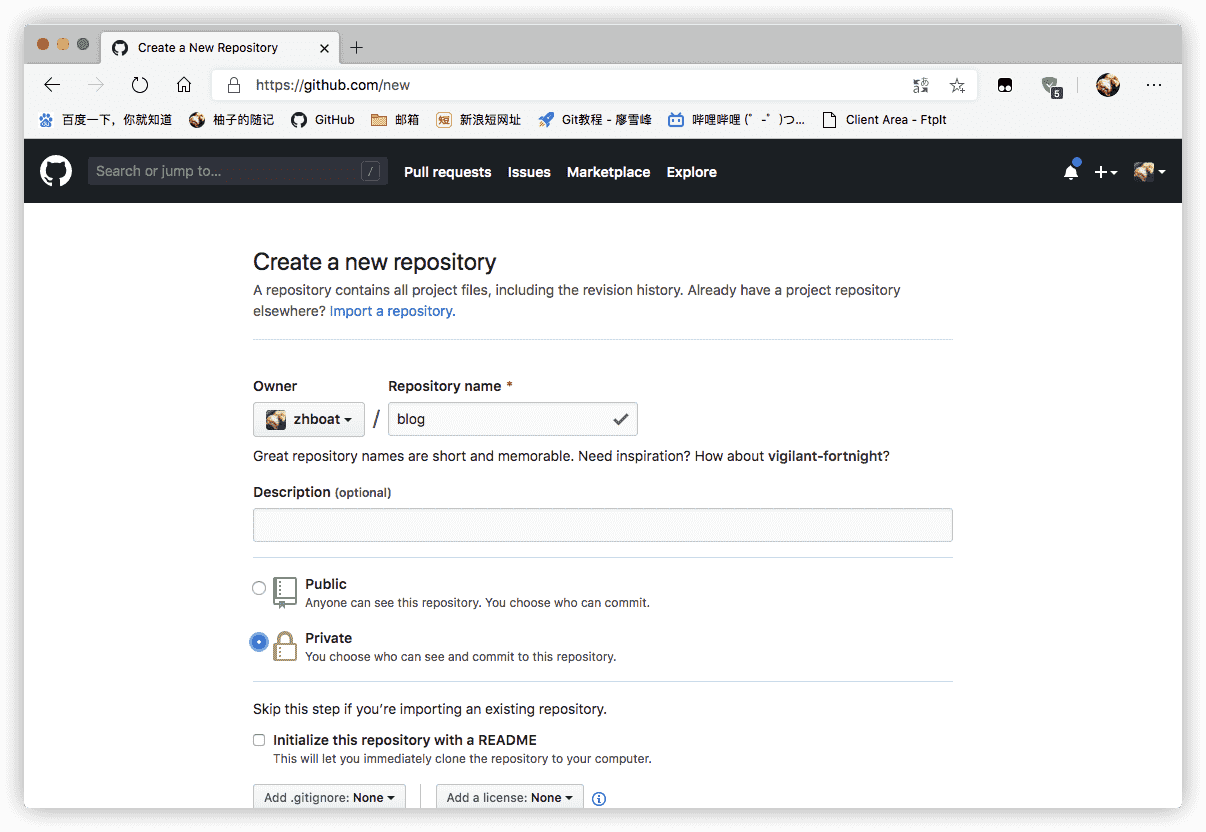
创建私有库
密钥对
上篇文章讲过啦创建秘钥对
初始化仓库
在本地博客路径执行hexo clean,然后复制这些文件到一个新目录,除了node_modules
新目录中初始化git仓库git init,然后连接至远程仓库git remote add origin 仓库地址
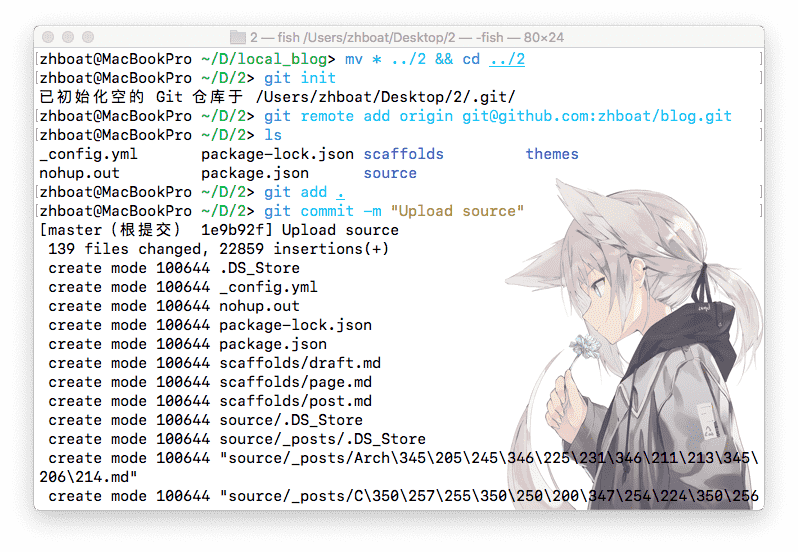
然后git push -u origin master上传到远程仓库
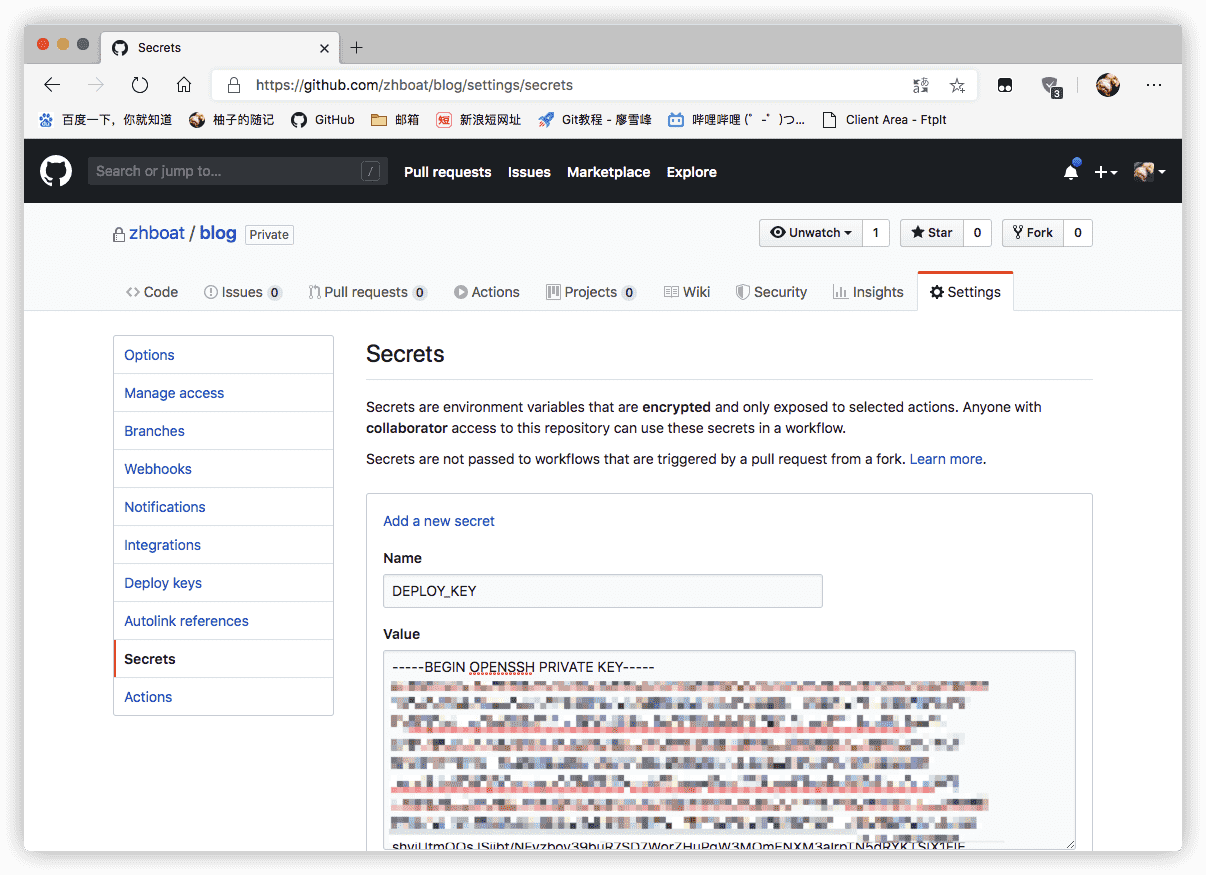
添加Secrets
在仓库–>setting–>Secrets里添加一个DEPLOY_KEY内容是你本地私钥,用cat ~/.ssh/rsa查看,并整段复制
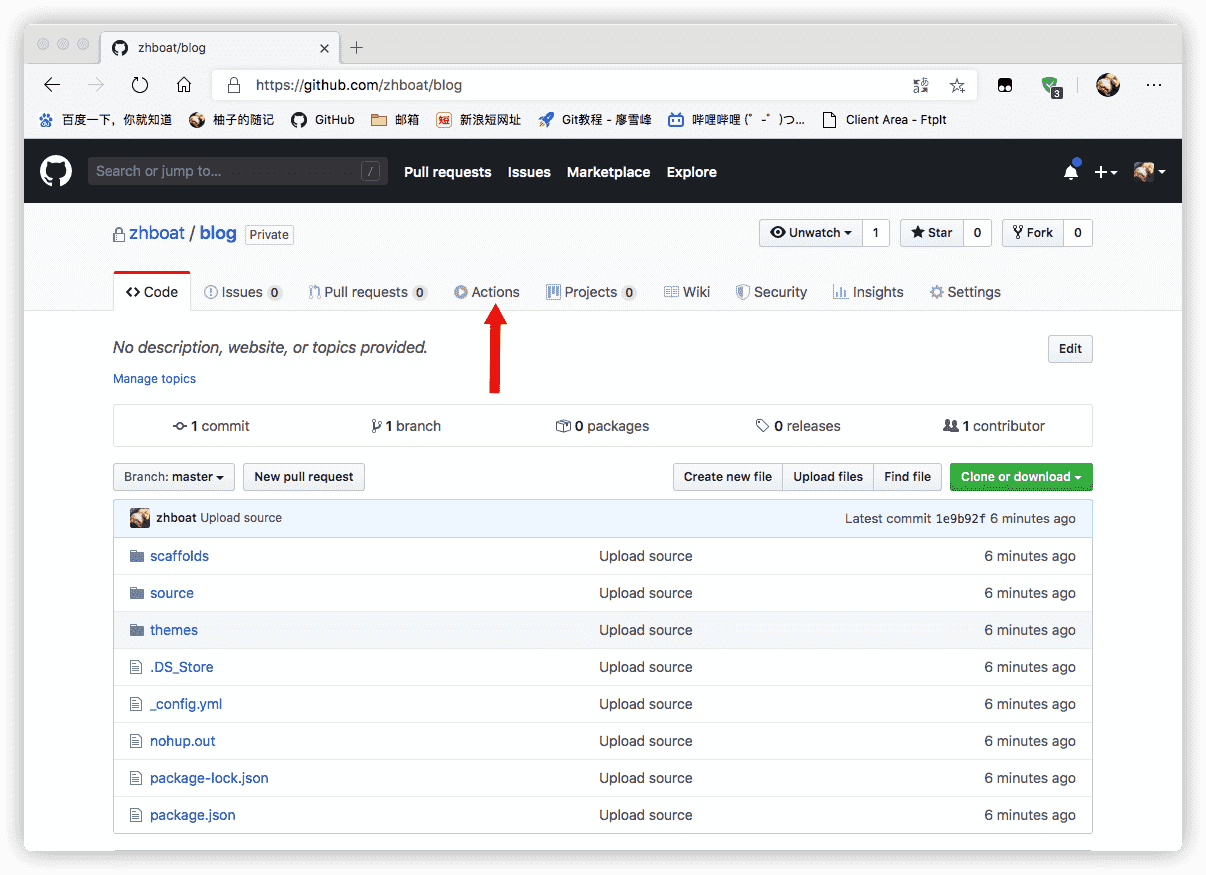
Action
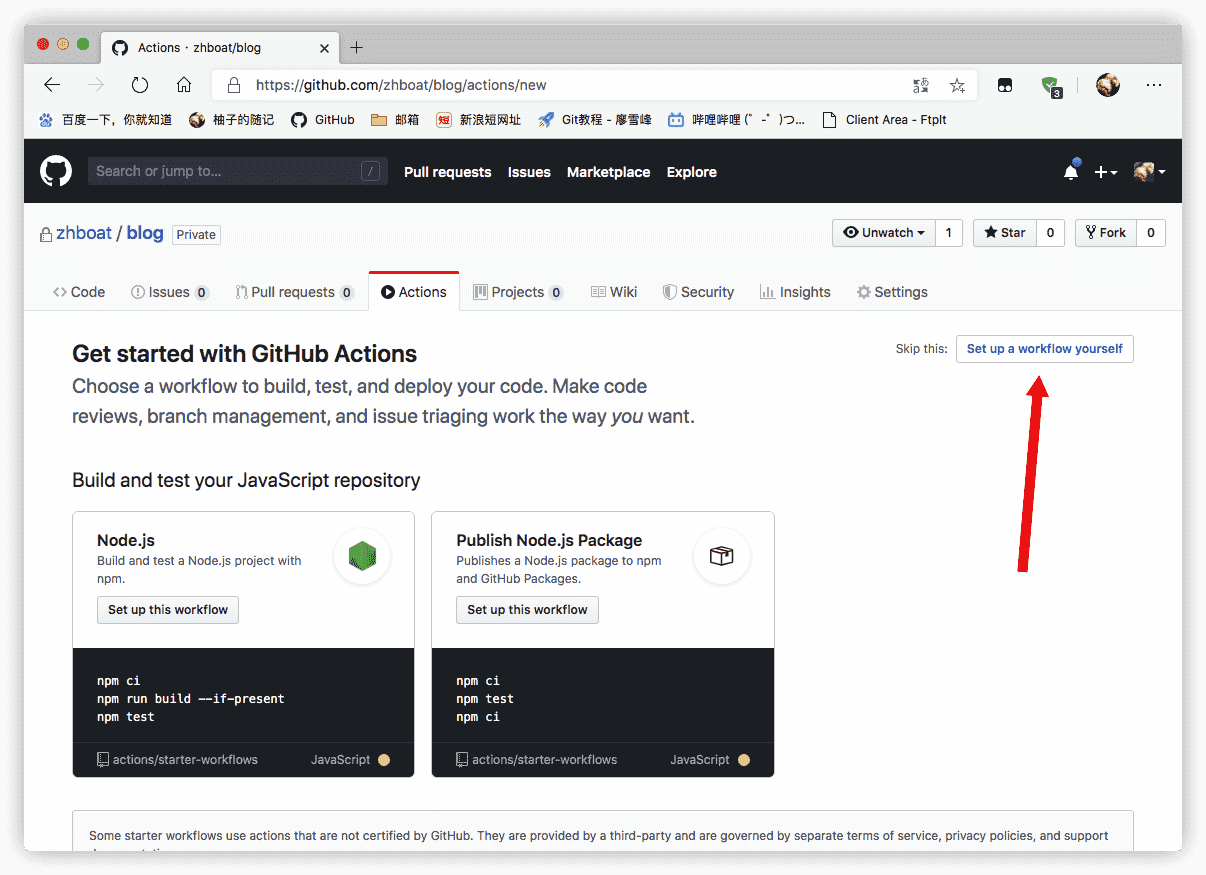
点击私有库中的Action
然后点击Set up a workflow yourself
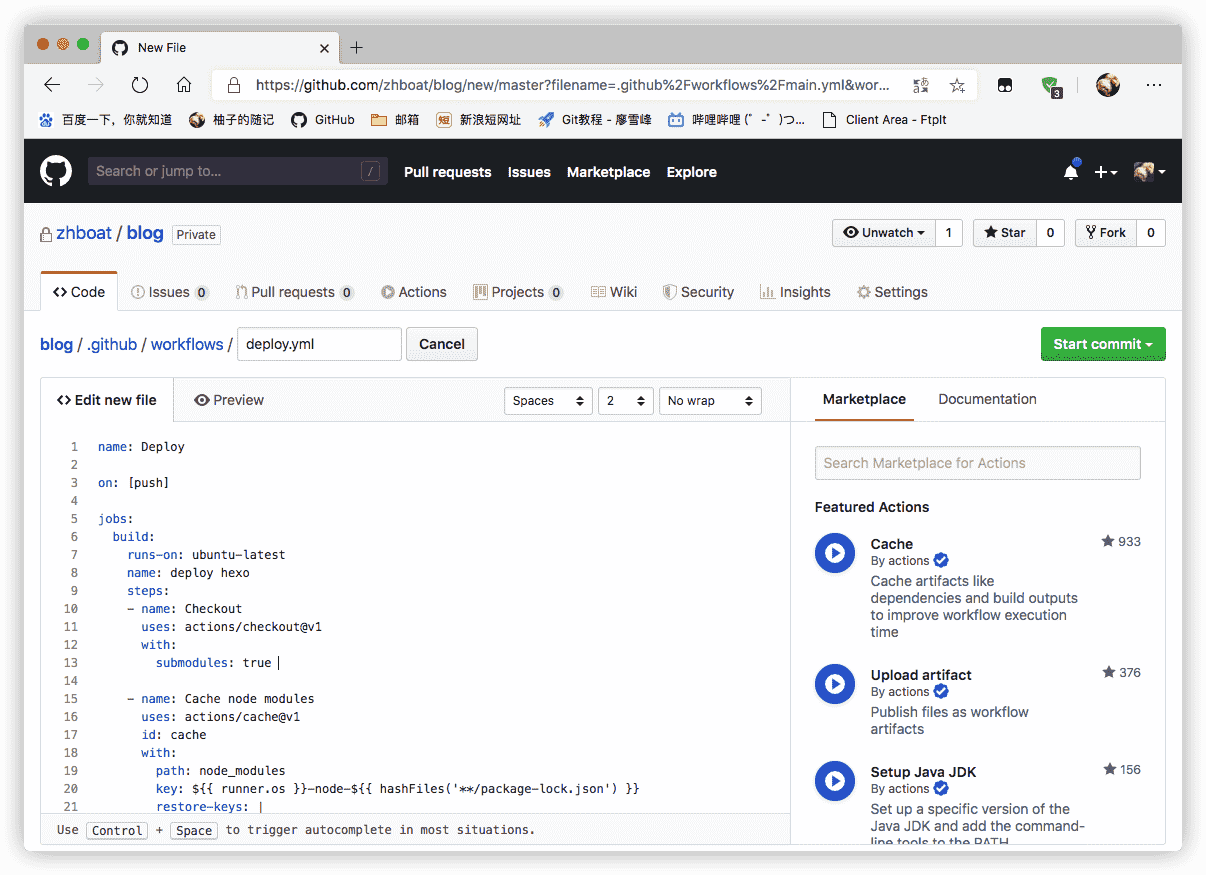
然后复制粘贴到输入框,注意修改user_name: 你的github用户名 user_email: 你的github邮箱 SOURCE_REPO: "原仓库(gitpage)" SOURCE_BRANCH: "分支" DESTINATION_REPO: "目标仓库" DESTINATION_BRANCH: "分支"这些变量为你自己的信息
1 | name: Deploy |
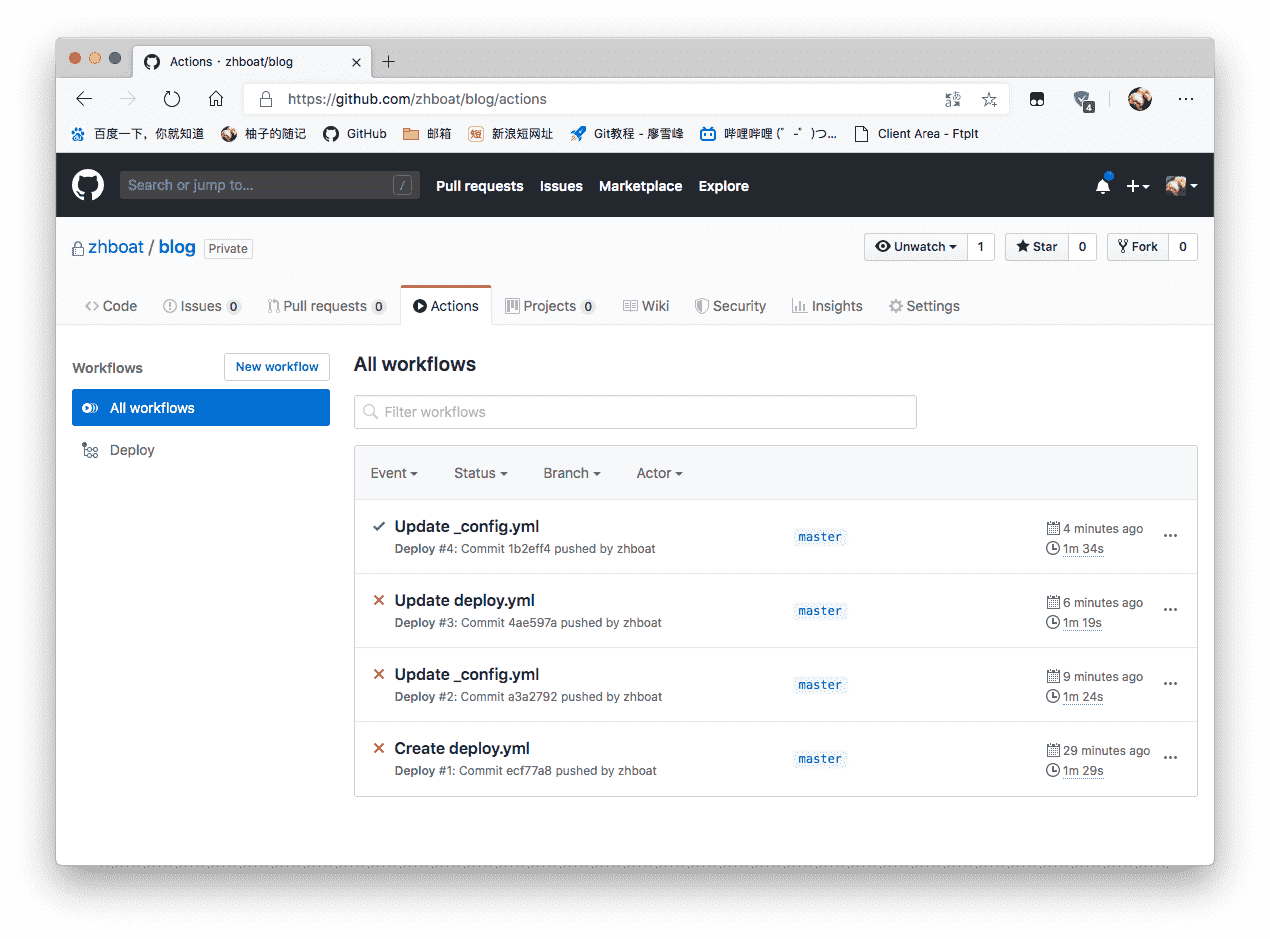
过一会就能看到Action通过了(我忘记把_config里coding去掉了)
当写完workflow后别忘记在本地git pull(,或你在本地写完再git push也是一样)
配置
一定要规范_config!!!
e.g
1 | deploy: |
CNAME和README的处理
CNAME和README直接丢到source文件夹内就行,如果你的README是md格式,请在_config.yml里添加一行skip_render: README.md
后续
换设备的话只需要从github克隆仓库后就行,无需再安装nodejs
在source/_posts里新建xx.md,写完文章后push到仓库就能自动部署
其实这样部署有个弊端就是gitpage的commit会清空
但是懒癌患者也不会去看commit的^ ^
比懒可没人赶得上我
说起懒,咱就觉得git add . git commit -m git push这三条命令敲下来比hexo g -d来的更麻烦了,这可太不妙了
脚本可是万能的😉
新建个sh
1 |
|
修改fish的函数
1 | function push |
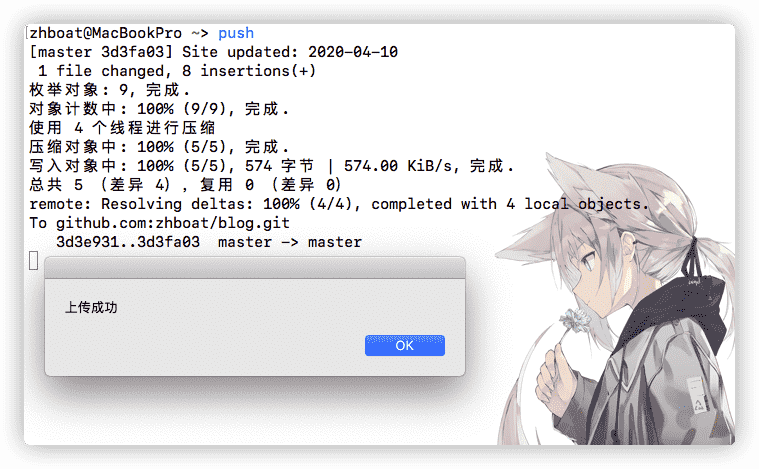
用脚本编辑器添加个AppleScript
1 | display dialog "上传成功" buttons {"OK"} default button 1 |
巴适得很~ ؏؏☝ᖗ乛◡乛ᖘ☝؏؏
参考https://www.cnblogs.com/deppwang/p/12326906.html
git-sync:https://github.com/marketplace/actions/git-sync-action
hexo-action:https://github.com/marketplace/actions/hexo-action